Camtasia for Mac Quick Reference Guide
Camtasia for Mac is a video recording software that allows you to digitally capture your entire screen or even a customized region on your desktop. In addition, Camtasia for Mac gives users the power to edit their media by adding audios, videos, pictures, and much more!
Camtasia Editor Interface
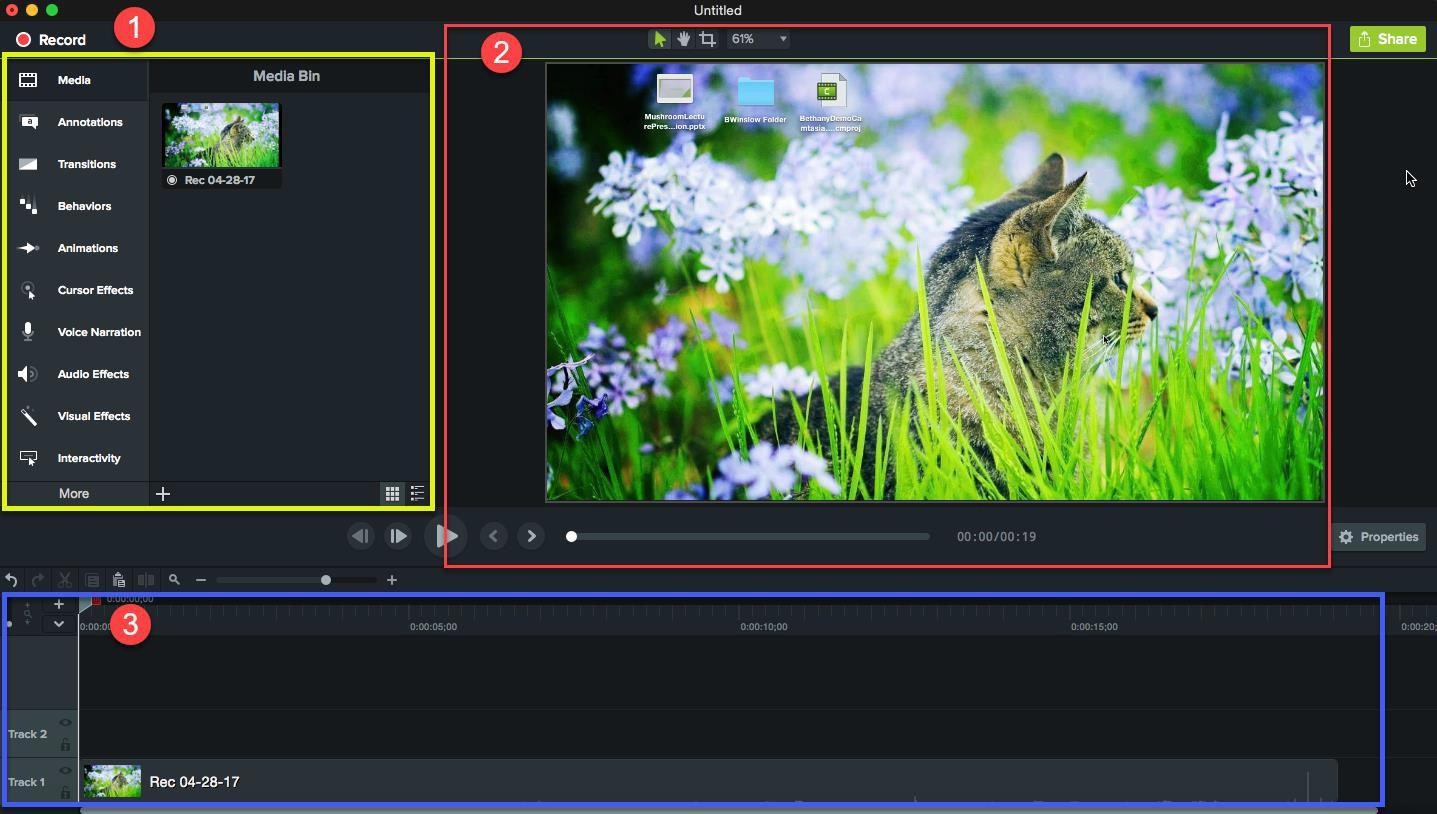
- Media Bin (Yellow Box) - This is the storage area for all media used in your project. You can drag and drop items that you would like to use in your project. The menu down the left side are a variety of options to edit & customize.
- Preview Window (Red Box) – This is where you can preview your video as the project stands. Features include: editing the video dimensions, crop tools, resizing media, and playback controls.
- Timeline (Blue Box) - The Timeline is the area where you can assemble all of your media including the timings of your zoom animations, callouts, and markers. This area also allows you to add multiple tracks, cut/copy/paste selected media from tracks, adjust volume and much more.
Create a Recording
In order to begin recording, whether it be a screencast, your webcam, or an audio capture, you must click the bright red circle at the top left corner of the Camtasia Editor. Another quick way to begin recording is to press Command+Shift+2.
A small window will appear which will give you a set of options.
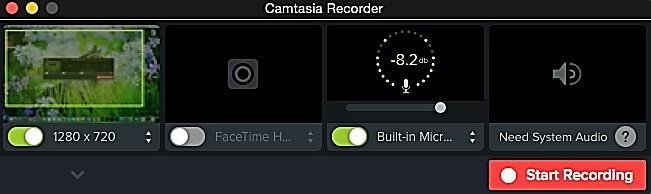
- Do you want to capture your whole screen, a customized region, or any of the preset sizes designed for a specific device or player?
- Do you want to capture a video of yourself with your webcam? If you do, click on the camera icon (FaceTime).
- Do you want to narrate? Then be sure to click on the microphone icon. (System audio is only needed if you want sound from the computer, like a YouTube video.)
Now that you know what you would like to record, click the big red circle with the letters rec inside of it. A 3-second countdown will appear and will begin recording. Be sure to press Command+Shift+2 to pause your recording or Command+Option+2 to completely stop recording.
Once you are done recording your video you will see that it is now added to your Media Bin.
Drag and drop your video into your timeline to begin editing.
Sharing Camtasia Videos
To share your completed Camtasia video, export it to Panopto and wait until the autogenerated captions appear. Edit the captions and share the Panopto video on Canvas or through a link.
If you'd like to share your Camtasia video so other people can edit it make sure to share the project as a Zip folder. This will save your entire project file with all additional media and edits into one sharable folder.
To archive or share your Camtasia project, click on File → Export as Zip. Remember, if you want to share your project so that someone else can make edits to it using Camtasia, you must give them this zipped folder.