Camtasia Quick Start (Windows/PC)
Camtasia is a video recording software that allows you to digitally capture your entire screen, a specific application window, or a customized region on your desktop. In addition, Camtasia gives you the power to edit your media by adding audios, videos, pictures, and much more!
The Welcome Window
By default, Camtasia will load up the Welcome Window where you can get started by selecting:
- New Project – this will open the Camtasia editor
- New Recording – this will open the Camtasia recorder
- Open Project – this will prompt you to browse for an existing project
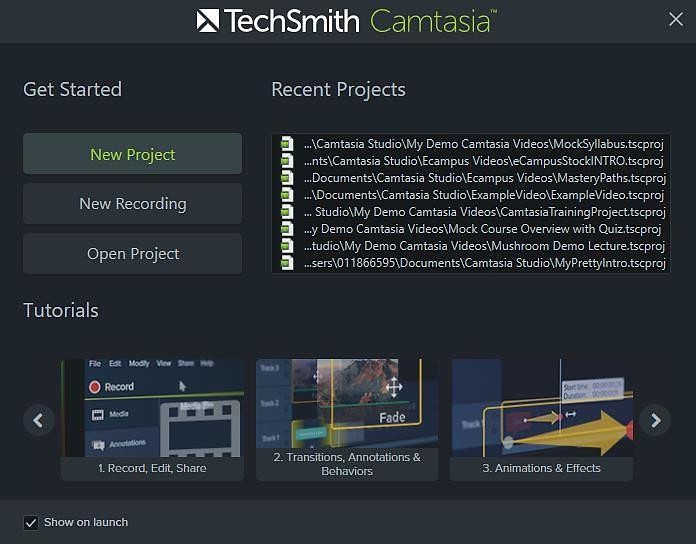
From the Welcome window you will also see a list of your recent projects and be able to access tutorials.
Getting Started
Click on New Project to open up the Editor window for a first look around:
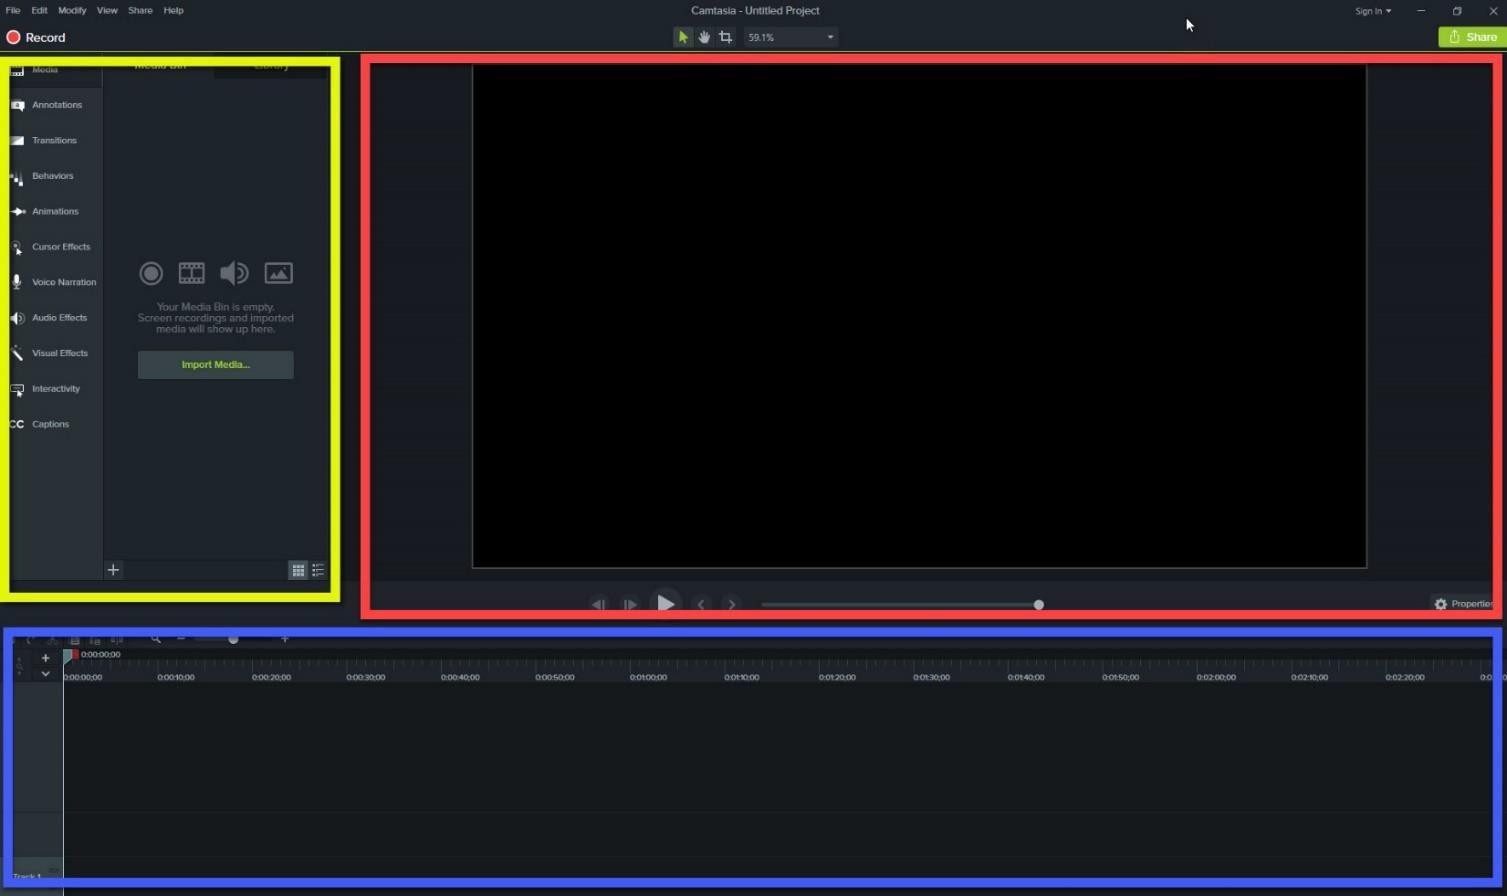
The Editor Window is divided into 3 sections:
- Clip Bin (yellow box) – This is the storage area for all media used in your project. The menu on the left lets you add callouts, transitions, animations, and much more. Select objects you want to use, and drag and drop them to the Timeline.
- Preview Window (red box) – the area where you can preview your video. From here you can edit the video dimensions, use crop tool, resize/zoom in to see what you are doing, playback and navigate frame by frame, and adjust the properties of annotations (move, color, line size etc.).
- The Timeline (blue box) – this is where you assemble all your media including the timings of your zoom animations, callouts, and markers. This area also allows you to add multiple tracks, cut/copy/paste selected media from tracks, adjust volume and much more.
Recording
In order to begin recording, (whether it be a screen, webcam, or audio capture), click the Record button in the upper left corner.

NOTE: You can also do this from the previous welcome window.
The Capture Window (shown below) opens up and will give you several options:
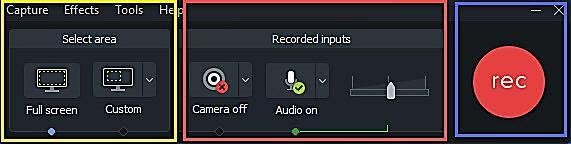
- Select Area (yellow box) – Full screen will record the entire screen. Clicking custom will enable you to select a specific size or a part of the screen. Use your mouse to click and drag open an area to record or to reposition the recording area. NOTE: 720 HD (1280 x 720) is a good standard size that is viewable on almost all devices, but you can record in any size you want.
- Recorded Inputs (red box) – By default, the audio is on, but you can also record yourself via the webcam. The video of you will default to the lower right hand corner of your recording, but you can resize, reposition, or even delete it when you edit your recording. (NOTE: choose system audio only if you need to capture computer sounds or the audio from a YouTube or other video you’ll play while recording.)
- Record Button (blue box) – The red “rec” button starts the recording.
Once the desired screen size is selected, press the red “rec” button to start recording the screen. You will get a recording countdown and your screen will look similar to the one shown below:
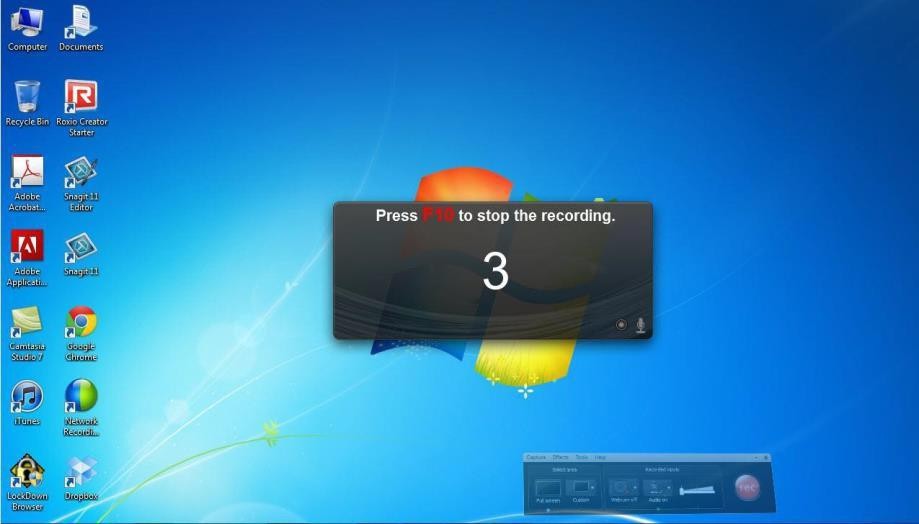
When you are done recording, press F10 to end your recording. You can also click on the Stop button in the recording window (which defaults to your system tray). Click to “Save and Edit” will open your recording in the Camtasia Editor.
Sharing Camtasia Videos
To share your completed Camtasia video, export it to Panopto and wait until the autogenerated captions appear. Edit the captions and share the Panopto video on Canvas or through a link.
If you'd like to share your Camtasia video so other people can edit it make sure to share the project as a Zip folder. This will save your entire project file with all additional media and edits into one sharable folder.
To archive or share your Camtasia project, click on File → Export as Zip. Remember, if you want to share your project so that someone else can make edits to it using Camtasia, you must give them this zipped folder.